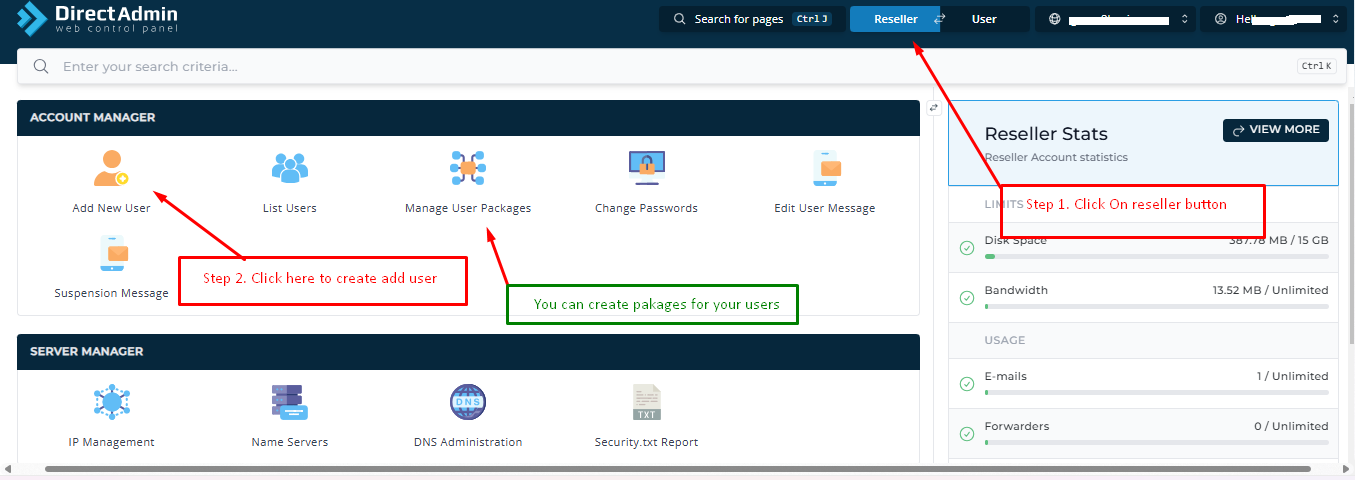
This tutorial will guide you through the steps of creating a user account in your reseller panel.
1. Log in to the Control Panel
Begin by logging in to your control panel using your login credentials.
2. Switch to Reseller Mode
Once logged in, you might be in the user panel mode by default. To create user accounts, you need to switch to reseller mode. Look for a button labeled “Reseller” or similar at the top of the control panel and click on it. Refer to the screenshot provided for reference.
3. Create a User Account
Now that you are in the reseller panel, you can create user accounts. You will likely see an option to “Create Package” or “Add New User.” This allows you to create different packages with varying features and resources for your users. Click the button to add a new user.
4. Fill in the User Information
A form will appear where you need to enter the details for your new user account. This typically includes information such as:
- Username
- Password
- Domain Name
- Email Address
- Package (select the package you created earlier)
Fill in all the required fields and click the button to create the user account.
Screenshot 2:
5. Provide Login Information to the User
Once the user account is created, you will need to provide your user with the following information:
- Username
- Password
- Nameservers (These can be found in your reseller panel settings)
6. Nameserver Propagation
Inform your user that after updating the nameservers on their domain, it might take a few hours (up to 48 hours in some cases) for the changes to take effect due to a process called DNS propagation.
7. Login URL
Provide your user with the login URL for their account. This URL will likely be similar to the one you used to log in to the control panel, but with a different port number (e.g., https://premium58.manageserver.in:2222/).
By following these steps, you can successfully create user accounts in your reseller panel and provide your users with access to their hosting accounts.
